In this tutorial you will learn how to build a wireless button and connect it to the Sprite Media Player.
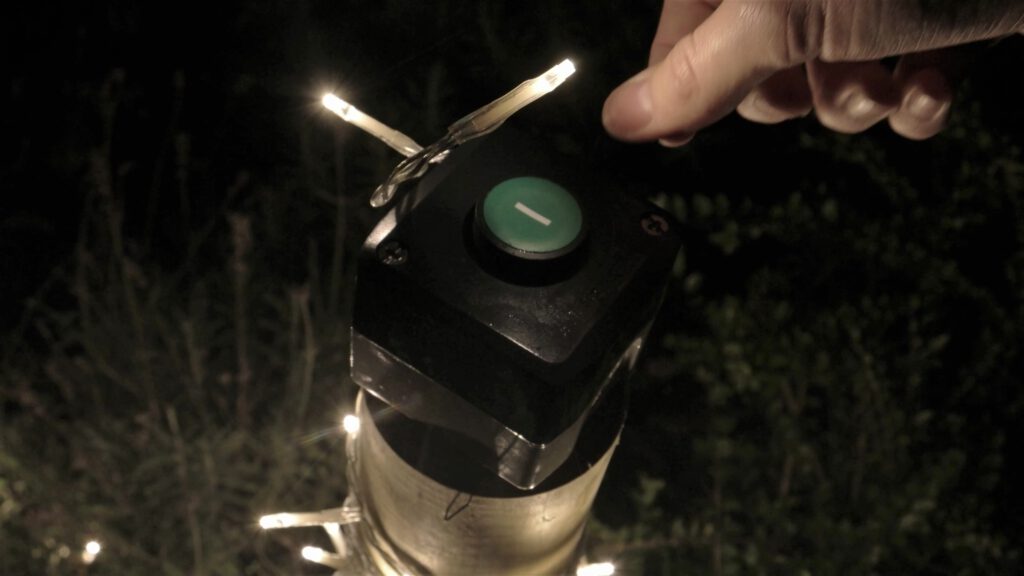
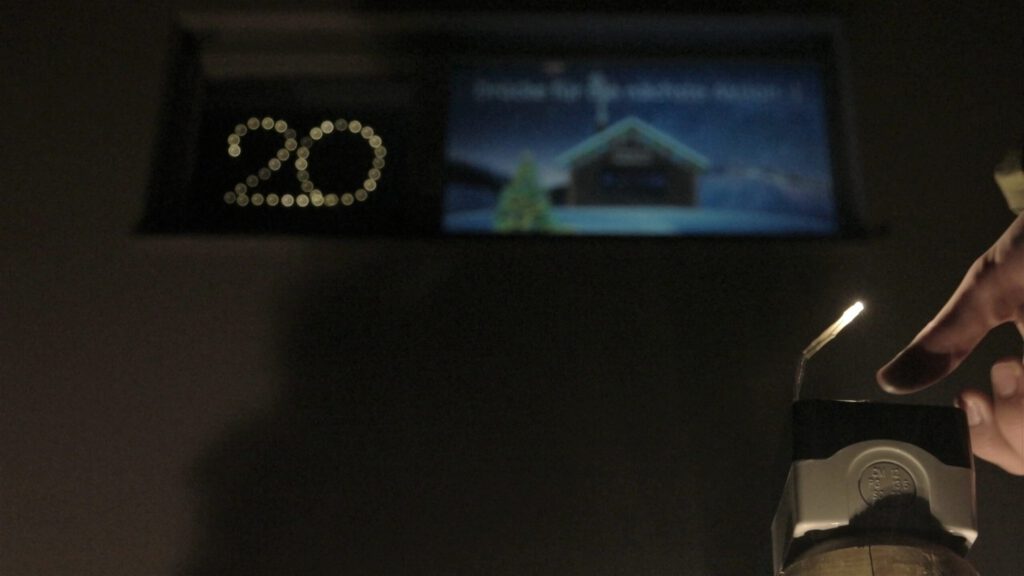
Customer application images

Material list
1x Sprite Media Player (DV-S1)
- America, International – AtmosFX Inc. – Click here¹
- Europe – Digital Signage Hamburg GmbH (Sirkom) – Click here¹
1x USB-Stick/USB-Harddrive/SD-Card
- USB Stick/Harddrive – max. 2TB – Speed USB2.0
- SD-Card – max. 128GB
1x Projector/TV/Screen/Jukebox (or similar)
Which video or audio device you connect depends entirely on your application. The player offers HDMI, AV and jack 3.5mm as connections.
1x Suitable video/audio cable
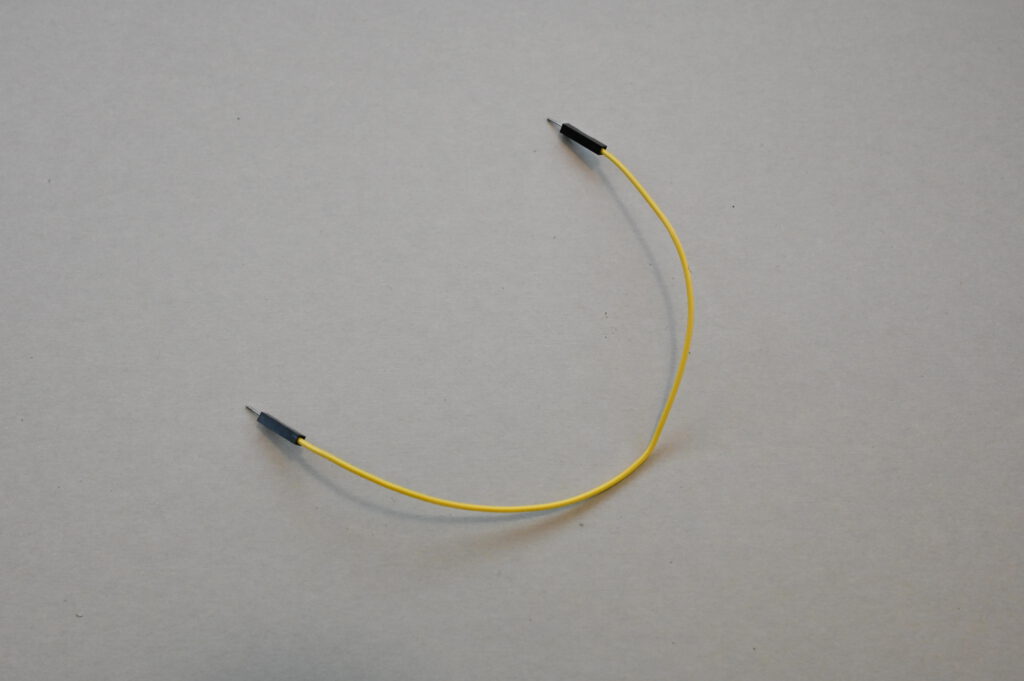
1x Jumper cable or similar
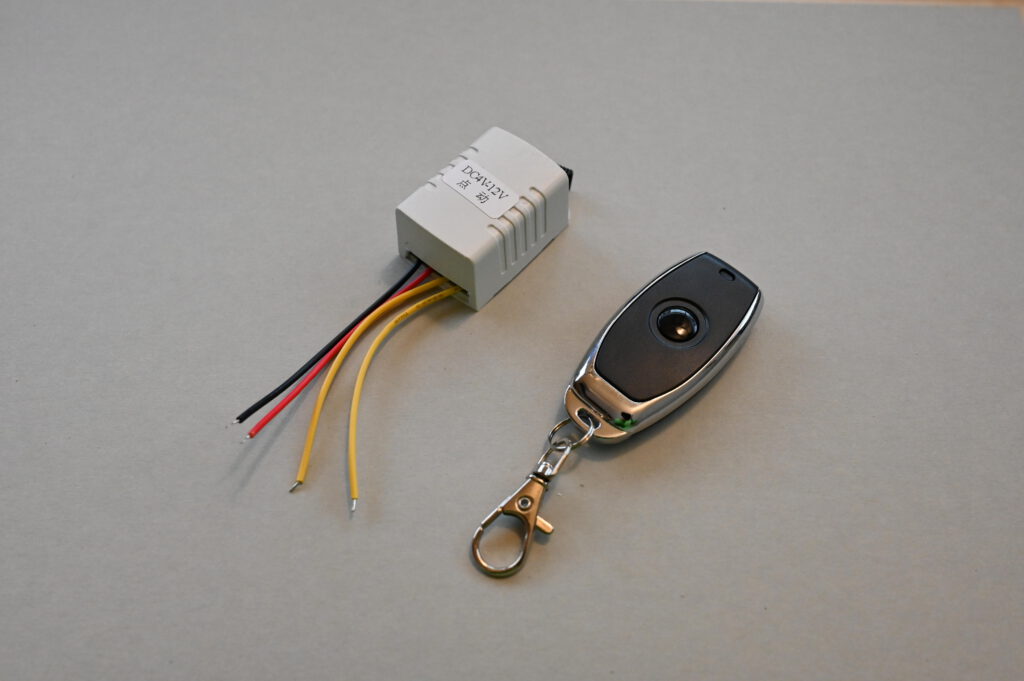
1x (Garage door) Radio relay
Attention! According to the data sheet, the wireless relay used in the manual consumes less than the 100mA that the Sprite provides at the I/O output at 5V. With other or faulty products, which need more current, the Sprite could be damaged. For the damage to the Sprite caused by replicas, I assume no liability!
1x Pushbutton with housing

1x I/O connector for the Sprite (is included with the Sprite)
How-To Guide
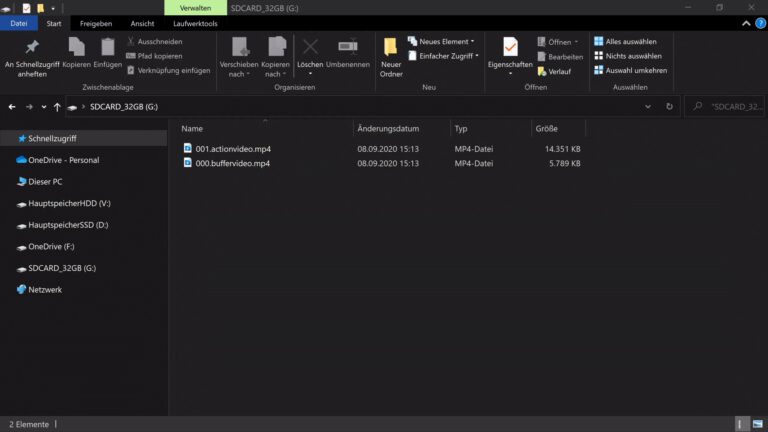
- Rename the files correctly
To ensure that later the sprite knows when to play which video/audio file, the naming of the files is crucial. Important, you need at least two. One file (“000.mp4”) is the loop file. This file will be repeated all the time, as long as nobody triggers the motion detector. As soon as someone does, the file 001.mp4 will be played. If you have several files that should alternate when triggered, name them from 002.mp4, 003.mp4 to 200.mp4.
Note:
If you want to keep your files more organized, you can also name files like “000.myverylongfilename.mp4”. Do not use spaces, underscores or other special characters. Use 32 or less characters including the 2 periods. - Copy your Files to the root folder on the emtpy storage medium
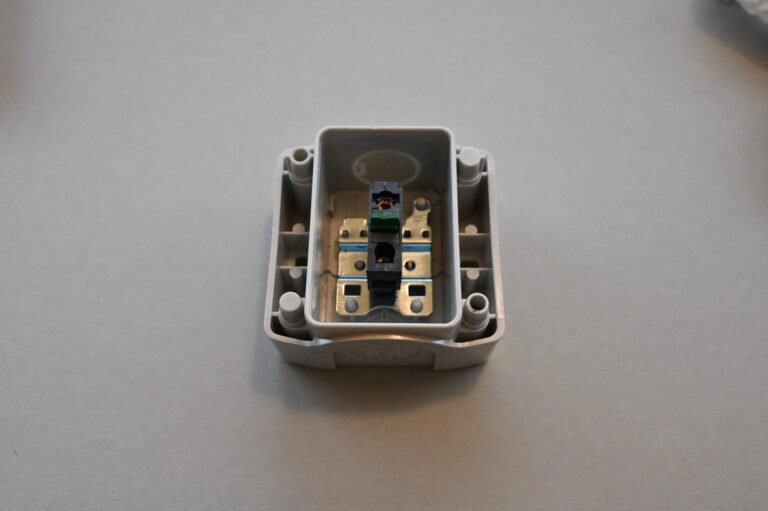
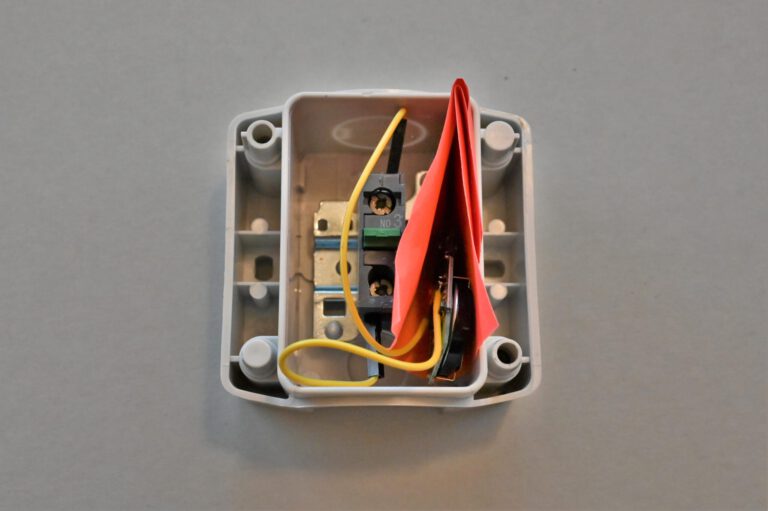
- Connect the receiver or the relay to the I/O connector.
Red/Plus=> L, Yellow1=>R, Yellow2+Black/Ground =>Ground
In the example, a relay is used which is supplied with power via the red and black lines. If you press the remote control, the contact between the Yellow lines is established. When the connection is made between the I/O input and Ground, this is seen as a trigger at the player.
Attention! According to the data sheet, the wireless relay used in the manual consumes less than the 100mA that the Sprite provides at the I/O output at 5V. With other or faulty products, which need more current, the Sprite could be damaged. For the damage to the Sprite caused by replicas, I assume no liability!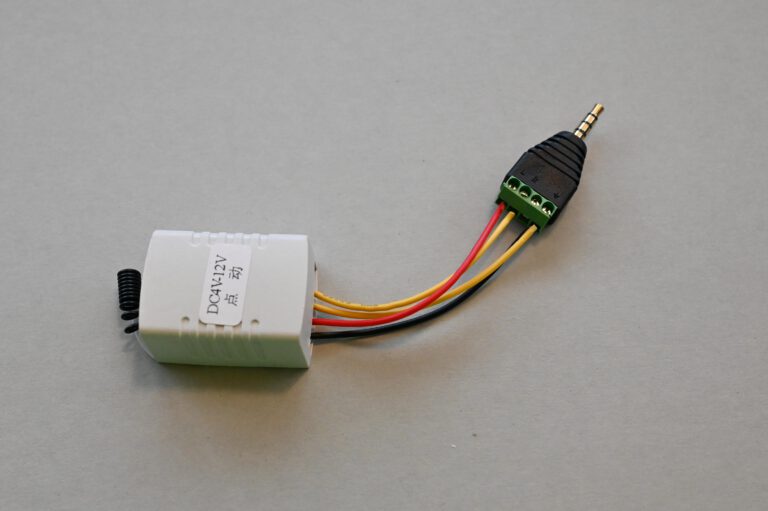
- Plug the I/O-connector into the I/O-port of the Sprite
The Sprite should be switched off or not supplied with power at this time!

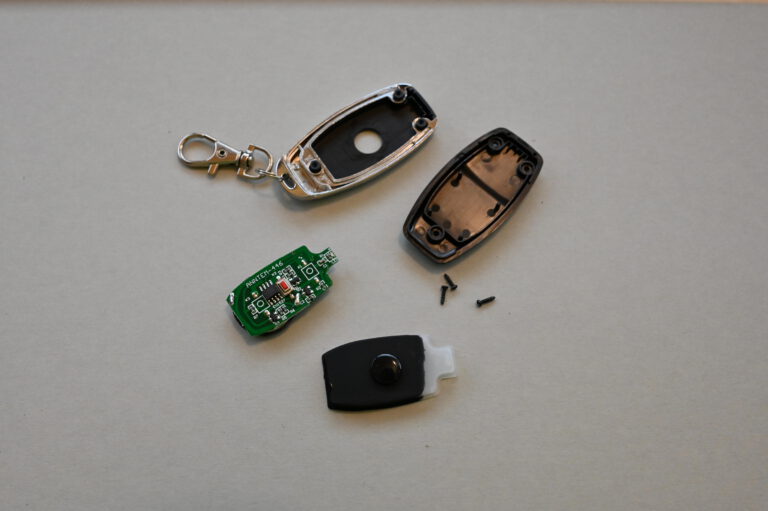
- We continue with the remote control

- Disassemble the remote control into its individual parts
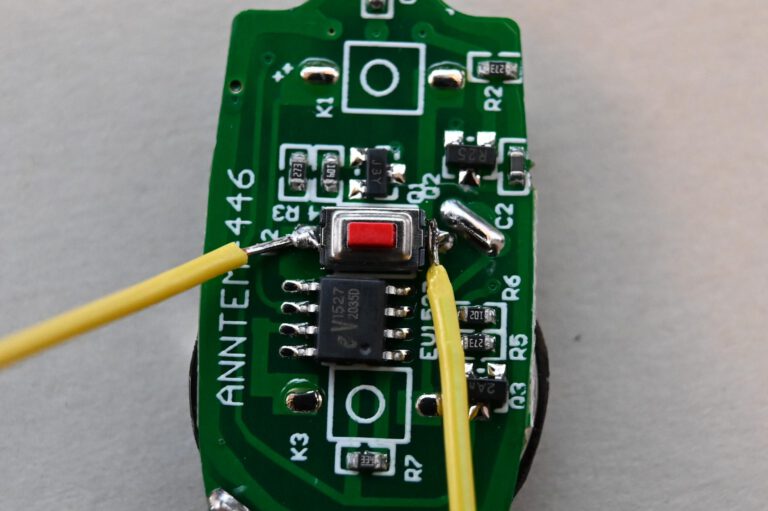
- Get the jumper cable…

- …and divide the jumper cable into two equal halves

- Solder the ends (without connector) to the contacts of the push button
By holding the two plugs together, the remote control should be triggered. Once you have done that, we recommend to fix the solder joint with liquid glue (no hot glue!).
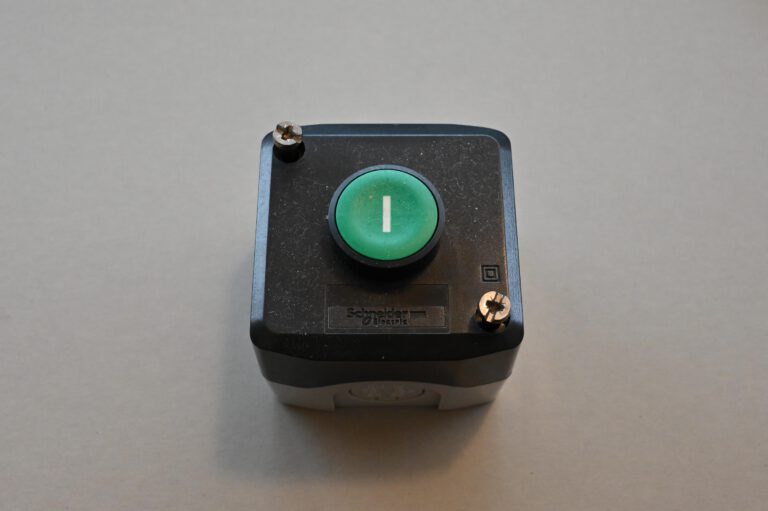
- Assemble the pushbutton
Use the pushbutton with the NO module (Normally Open). You can recognize the NO by the numbering of the connections 3 + 4.
- Insert the remote control
Connect the other two ends to the push button (3+4). If necessary, protect the circuit board from contact with the metallic base plate (e.g. by using a paper bag or a bag).
- Close the housing
- Configure the Sprite Media Player
Press “Setup” on the remote control of the Sprite. The menu should open. Then select the following settings in the following subitems:
“Play Mode” => “Video Control Mode”
“Control Mode” => “Trigger Low No Interrupt”
If you need further help, please have a look at the instructions for connecting a normal push button.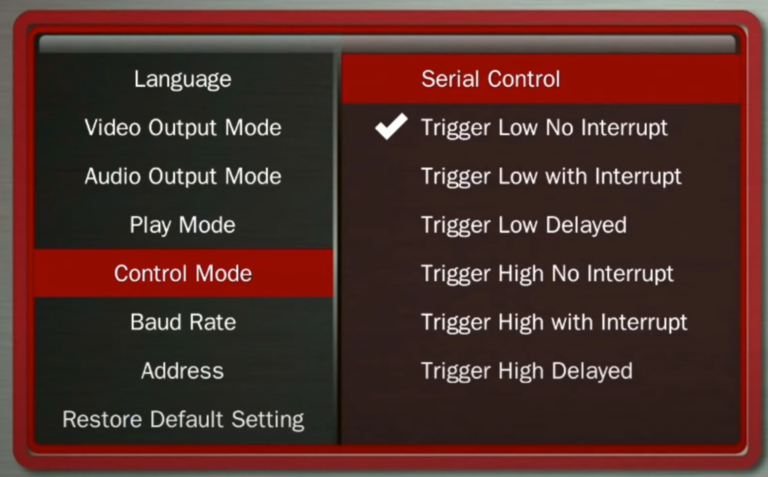
- Done!
How-To Video
Unfortunately there is no extra video for the wireless version. Therefore the video for the normal push button is linked here.
Tips and Tricks
“This often happens if your video bit rate is too low. We suggest a bit rate of 20,000Kbps (20Mbps) or higher. Do not compress the files. Let the bit rate be high at the normal setting. […]
The file’s pixel size should be 1920 x 1080 for the 1080p or 1080i settings, and 1280 x 720 for the 720 settings. It is helpful to have all of the files made in the same format and encoding. You can also try another Video Output Mode setting, 720p 50, 720p 60, 1080p 24 and etc., in the Setup Menu. Often this will solve the issue without altering your files. You may need to alter your files with video editing software.
These settings work well and are recommended for high quality video with no glitch:
CODEC = H.264
Pixel size = 1920 x 1080
Frame rate = 60 fps
Data Bit rate = 20,000Kbps (20Mbps)
Audio bit rate = 128 or 192 or 384 kbps
Audio Channels = 2 (stereo)
Audio Sample Rate = 48KHz
Set the Sprite® Video Output Mode to 1080p_60HZ“
—Quote from “DV-S1 Sprite® Manual revision 4.00 for firmware version 20210416” (Source: medeawiz.com/Downloads.html)
If you don’t have a video editing program or have problems with all the settings, feel free to use our MedeaWiz-VideoConverter tool.
“Do not use folders. Put files directly on the root of the SD or USB.
Try to play the file using the remote control. Press the blue File button, and then navigate to the file using the green Enter key and the orange Arrow keys. Select the file and press the Enter key. If the file plays, it may not be named properly or the Sprite® is not in the correct Control Mode.
If using video files, the Sprite® must have the Play Mode set to Video or Video Control Mode. If using audio files, set to the Audio or Audio Control Mode. Control Modes require at least 2 files.
The looping file must be named 000 and the first trigger file named 001.
If the file will not play by using the remote control, then it may be corrupt or made with parameters not supported by the Sprite®. Make sure the pixel size is a “television” size, 1920 x 1080, 1280 x 720, 720 x 480 or 640 x 480 etc. Videos made for websites at odd pixel sizes will play on your PC but not on the Sprite®.
The Sprite® will not play 4K video files. Files with pixel sizes of 3840 x 2160 or 4096 x 2160 are 4K. Please convert the files down to 1920 x 1080 sizes using video editing software.“
—Quote from “DV-S1 Sprite® Manual revision 4.00 for firmware version 20210416” (Source: medeawiz.com/Downloads.html)
“If you do not see any video or Setup Menu displayed: Verify the blue power LED is on. Try pressing the HDMI or AV keys on the remote to switch the outputs. Verify the monitor is set to the input used. Verify the monitor and HDMI cable are good by swapping or trying another device on the input.“
—Quote from “DV-S1 Sprite® Manual revision 4.00 for firmware version 20210416” (Source: medeawiz.com/Downloads.html)
“The Sprite’s aluminum housing is designed to be part of the heat management system. The internal microprocessor has a solid copper heatsink that transfers heat to the outside air through the housing. While it is normal for the Sprite® to feel warm, if the ambient temperature is well over 100F (40C), extra heat management may be desired. Simply placing the Sprite® flat on a metal surface can reduce the temperature. A clean, unpainted aluminum plate, at least 12 x 12 inches (30 x 30 CM) works well.“
—Quote from “DV-S1 Sprite® Manual revision 4.00 for firmware version 20210416” (Source: medeawiz.com/Downloads.html)
“While files will play from the USB port from a USB drive, some HD video may not play well from some USB drives. For high bit rate files we recommend using the SD port with an SD card of sufficient speed to match your video file’s bit rate. For some HD video files a Class 4 may be ok, while others may need a faster Class 6 or Class 10. Test your video.“
—Quote from “DV-S1 Sprite® Manual revision 4.00 for firmware version 20210416” (Source: medeawiz.com/Downloads.html)
“You can reset the Sprite® to factory defaults without viewing the monitor by these steps:
1) Remove the power plug for 10 seconds and then restore power
2) Wait 10 seconds or longer for start-up to finish
3) Press the Setup key on the remote control
4) Press the down arrow key 7 times
5) Press the Enter key 2 times“
—Quote from “DV-S1 Sprite® Manual revision 4.00 for firmware version 20210416” (Source: medeawiz.com/Downloads.html)
“A) Video Control Mode or Audio Control Mode (any Trigger or Serial Control use):
The Sprite® searches for the 000 to use as the looping file, and searches for 001 to use as the trigger.
However, you can name them this way:
000.myfilename.xxx or 001.someverylongnamefile.xxx
Do not use spaces, underscores or other special characters. Use 32 or less characters including the 2 periods. We explain the operation in this manual using only numbers to keep it simple.
We suggest you use the numbers 000, 001, etc. to test your files as a starting point, and then add the longer names if you want them.
B) Video Repeat All, Audio Repeat All, Photo Repeat All (Not Trigger or Serial Control)
File play order will follow ASCII code sort order
Order of precedence:
– Space
– Numbers
– Capitols
– Underscore
– Lower case
Each file name is analyzed at each character position left to right for the sort order priority to determine the order the files will play in. To learn more about this, search for “ASCII sort order” in a web browser. To keep it simple you can use the naming method in section A above, or just use the numbering system 001, 002, 003, etc. to play files in order.“
—Quote from “DV-S1 Sprite® Manual revision 4.00 for firmware version 20210416” (Source: medeawiz.com/Downloads.html)
“The Sprite® has no way to Genlock or synchronize with any external device or another Sprite at frame accuracy. You can start trigger files on 2 or more Sprites with a single pushbutton or serial control. However there are very slight differences in the internal oscillator components that allow sprites to run at slightly different frame rates. Depending on your application and video files, the frame rate difference may be acceptable and unnoticed, or may not be acceptable. The longer the video in time, the more out of step the players will become until the next trigger. You should use the same encoding parameters, CODEC, pixel size, frame rate, bit rate and etc. for all files for best results. If you want, you can get better results by comparing a few Sprites to get a better match, or altering the video on the “fast” Sprite. Adding a few duplicate frames in the video file at regular intervals will “slowdown” the progression of the scene to better match the slower Sprite.“
—Quote from “DV-S1 Sprite® Manual revision 4.00 for firmware version 20210416” (Source: MedeaWiz.com/downloads)
“For all video and audio files:
Any file under approximately 3 to 5 seconds may be a problem. If they are too short, there may be unwanted results in some control modes.
The 000 loop / ambient file should in most cases be longer. A longer loop file will allow your SD card to last longer. A short file looping continuously reads a small area on the SD card. A long file stored across more bytes of the SD results in less reads per byte over time. All SD and USB have a MTBF rated average number of reads. This number is very large, but in an application that runs all day, every day, this will add up. If you make the 000 loop file 10 times longer, your SD card should last 10 times longer as well. Keep in mind that if you are using one of the Trigger Delay settings, your trigger file will not play until the end of your 000 loop file.
Most users will never have an issue with a file that is too long. The time limit for the length of any file depends on the file encoding and bits used per second. Lower bitrates, lower frame rates and reduced pixel size can increase the time allowed. The file size is normally limited to 4 GB. Larger files may be stored on the SD card or USB drive if it is formatted to NTFS.
The maximum SD card size for the Sprite is 128GB. The USB port will support up to a 2TB USB hard drive at USB2 speed.“
—Quote from “DV-S1 Sprite® Manual revision 4.00 for firmware version 20210416” (Source: medeawiz.com/Downloads.html)
Help
You have more questions? Then post them in the comments or contact us via the contact form!